The One-Evening Story Sprint: Shipping a Complete Questas Prototype from Blank Page to Playtest


You have an idea for an interactive story.
Maybe it’s a haunted museum tour, a branching sales roleplay, or a political thriller where every decision reshapes the map. You know it would be perfect as a playable experience—but the thought of planning, writing, and illustrating a full branching narrative feels… huge.
What if you could ship a real, playable prototype in a single evening instead?
That’s the promise of a one-evening story sprint: a focused, time-boxed session where you go from blank page to a shareable, testable story inside Questas. You won’t build your magnum opus in three hours—but you will:
- Validate your core premise with actual players
- Discover what choices feel fun or meaningful (and which don’t)
- Learn how the Questas editor, branching, and AI visuals fit your creative style
- Build momentum instead of endlessly “preparing to start”
This guide walks you through a practical, step-by-step sprint you can run tonight.
Why a One-Evening Sprint Works So Well
Long, open-ended creative projects stall for familiar reasons:
- Perfectionism: You keep expanding the scope instead of finishing anything.
- Tool anxiety: You’re still “researching platforms” six weeks later.
- Overplotting: You design a 200-node epic before writing a single playable scene.
A one-evening sprint flips that script:
- Constraints become fuel. A fixed timebox (e.g., 3 hours) forces you to prioritize what actually matters for a prototype.
- You focus on the player’s first 10–15 minutes. That’s where you test tone, mechanics, and core loops.
- You ship. By the end of the night, someone else can click a link and play.
If you’ve read our post on turning short fiction into modular scenes—From Short Story to Story System: Adapting Linear Fiction into Modular Scenes for Questas—this sprint is that philosophy, compressed into a single evening.
The Evening at a Glance (3–4 Hours Total)
You can adjust the timing, but here’s a realistic, repeatable template:
- 30 minutes – Define the playable slice
- 45 minutes – Map the branches visually
- 60 minutes – Write scenes and choices
- 30 minutes – Add AI visuals and polish
- 30 minutes – Playtest and collect feedback
If you only have two hours, you can still do a “micro-sprint” by trimming scope (fewer branches, lighter visuals). The structure remains the same.
Step 1: Define a Tiny, High-Stakes Slice (30 Minutes)
Don’t start with a universe. Start with a single, charged decision.
Ask yourself:
- Who is the player right now? (Role, goal, pressure.)
- What is the one moment where their choice really matters?
- What are 2–3 plausible options they could take?
- What’s the immediate consequence of each option?
Think in terms of scenarios, not themes:
- Instead of: “A sci-fi rebellion story.”
Try: “You’re a rebel courier caught at a checkpoint with contraband data. Do you bluff, run, or betray a contact?” - Instead of: “Sales negotiation training.”
Try: “You’re mid-call, and the prospect asks for a huge discount. Do you cave, hold firm, or reframe value?”
If you’re designing for learning or workplace use, this is very close to the approach we explore in Scenario-First Story Design: Building Training Questas That Start with Real-World Decisions. The sprint just forces you to pick one moment and commit.
Deliverable for Step 1:
Write a one-paragraph brief that covers:
- Player role and context
- The key decision
- The tone (serious, comedic, eerie, etc.)
- The rough outcome space (e.g., success, partial success, failure, secret twist)
You’ll paste or adapt this into your opening scene inside Questas later.
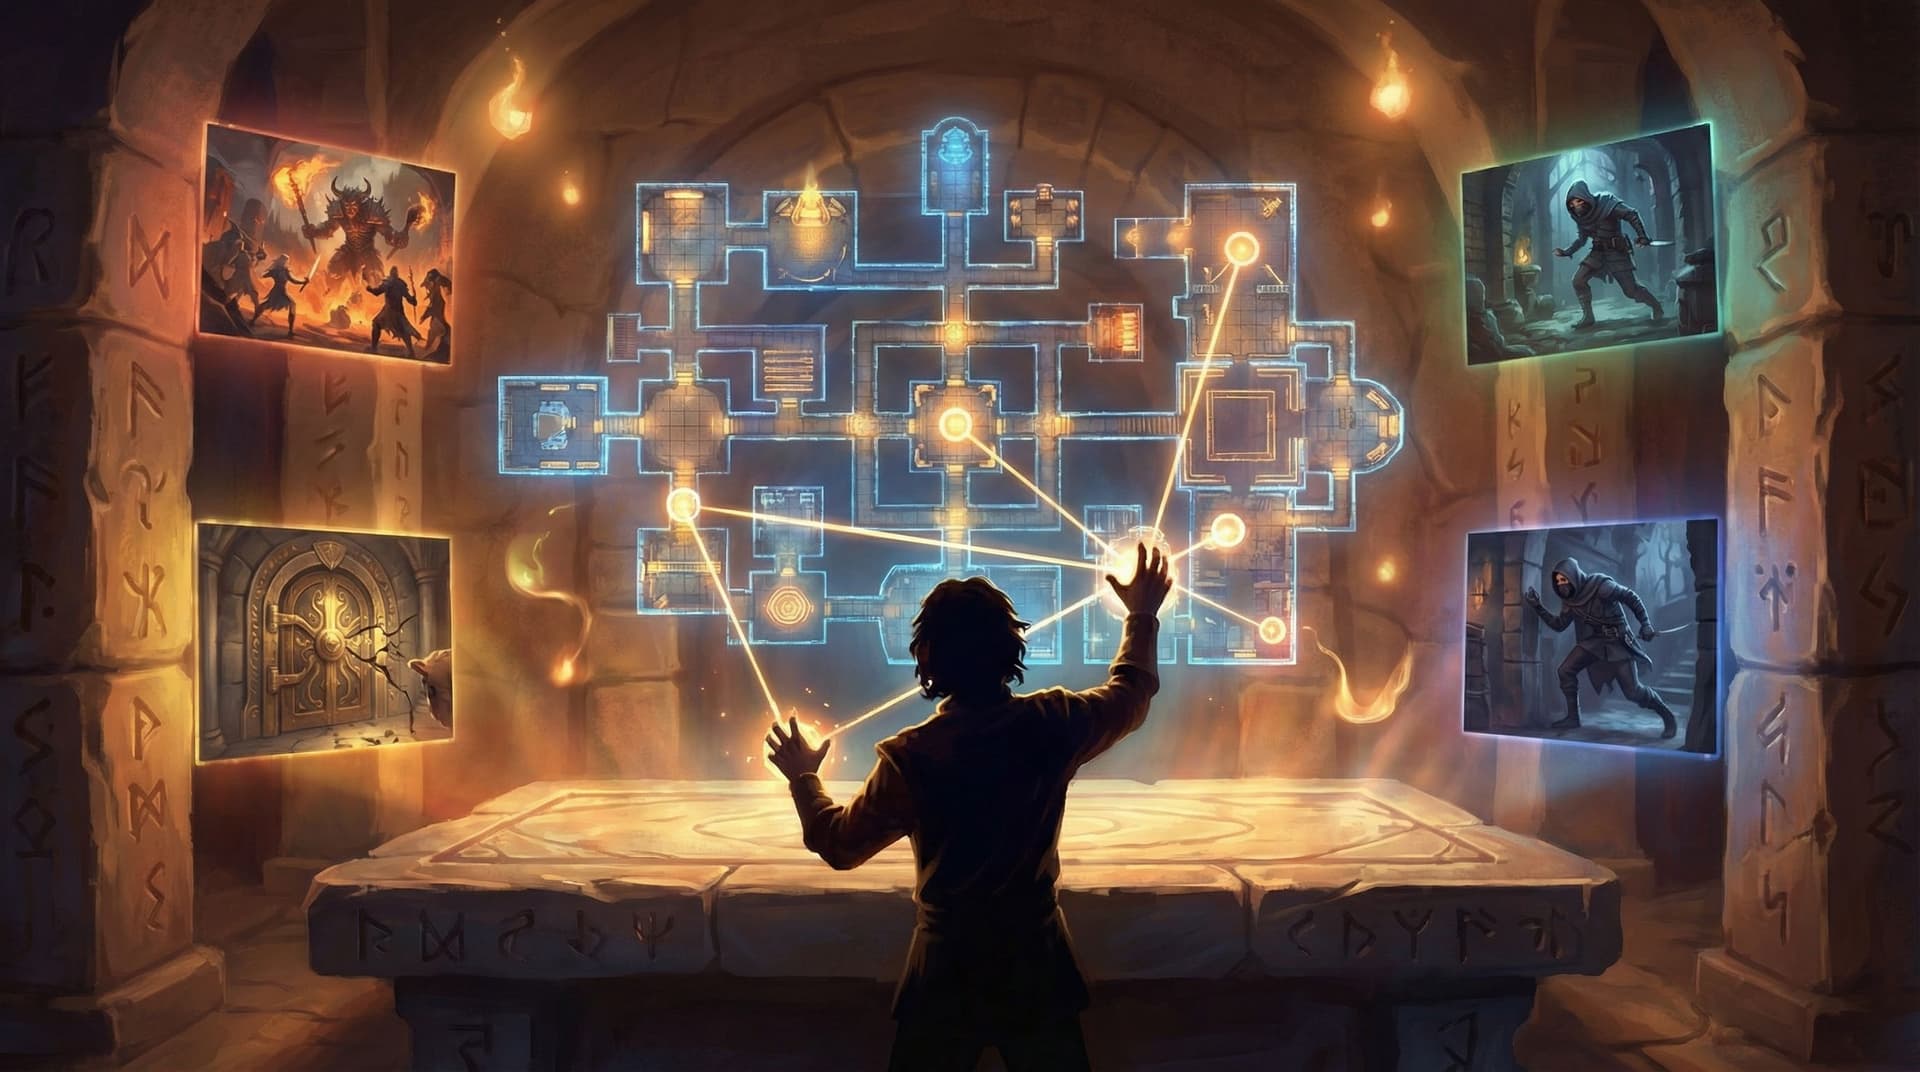
Step 2: Sketch the Branching Spine (45 Minutes)
Now you turn that key decision into a minimal story graph.
Open the Questas editor and:
- Create a start node: the scene leading up to your big decision.
- Add one decision node with 2–3 options.
- For each option, create one immediate consequence scene.
- From there, add one more decision or outcome per branch.
You’re aiming for something like:
- 1 intro scene
- 1 major decision node
- 3 branches
- 1 follow-up scene on each branch
- Optional: 1 “final state” scene per branch (success / fail / secret)
That’s 6–10 nodes total—plenty for a first prototype.
Keep the Graph Small and Readable
As you drag nodes around in the visual editor:
- Arrange branches left-to-right or top-to-bottom.
- Use clear node titles like
Checkpoint – Bluff,Checkpoint – Run,Checkpoint – Betrayal. - Color-code or label endings (e.g., “soft fail,” “hard fail,” “hidden win”) if your workflow uses tags.
If you’re coming from tabletop or dungeon design, this will feel familiar. You can layer in more complex encounter design later, using techniques from AI as Dungeon Builder: Designing Replayable Dungeons, Raids, and Heists in Questas. For tonight, keep it lean.
Deliverable for Step 2:
You can visually trace every path from the intro to some kind of resolution in under 10 clicks.

Step 3: Draft the Scenes and Choices (60 Minutes)
With the structure in place, it’s time to write fast.
Write for Momentum, Not Perfection
For each node:
-
Intro scene (1–2 paragraphs)
- Drop the player into the moment.
- Clarify stakes in concrete terms.
- End on a line that naturally leads into a decision.
-
Decision nodes (2–4 options)
- Each option should be:
- Actionable (“Offer a risky side deal”) rather than vague (“Be clever”).
- Distinct in tone or risk level.
- Written from the player’s perspective ("I…" or "You…" depending on your style).
- Each option should be:
-
Consequence scenes (1–3 paragraphs)
- Immediately show the result of the choice.
- Hint at longer-term impact, even if your prototype ends soon.
- Seed at least one surprising or vivid detail per branch.
Use AI as Co-Writer, Not Replacement
Inside Questas, you can use AI text assistance to:
- Punch up descriptions
- Suggest alternative phrasings for choices
- Brainstorm variations on a scene outcome
But treat AI as a collaborator, not an autopilot. You’re still responsible for:
- Keeping character voices consistent
- Making sure choices align with your design goals
- Ensuring consequences feel fair and foreshadowed
If you want a deeper workflow for this, our post AI as Co‑Writer, Not Ghostwriter: Collaborative Writing Workflows for Complex Questas Plots goes into detail. For a one-evening sprint, the key is: let AI speed you up, but don’t let it derail your core idea.
Guardrails to Stay on Schedule
To keep this to about an hour:
- Limit yourself to 150–250 words per scene.
- Cap choices at 3 per node. Four or more explodes your scope.
- Set mini timers: 10–12 minutes per node, then move on.
Deliverable for Step 3:
Every node in your graph has:
- Completed body text
- Clearly written choices (where applicable)
- A sense of tone that feels consistent across branches
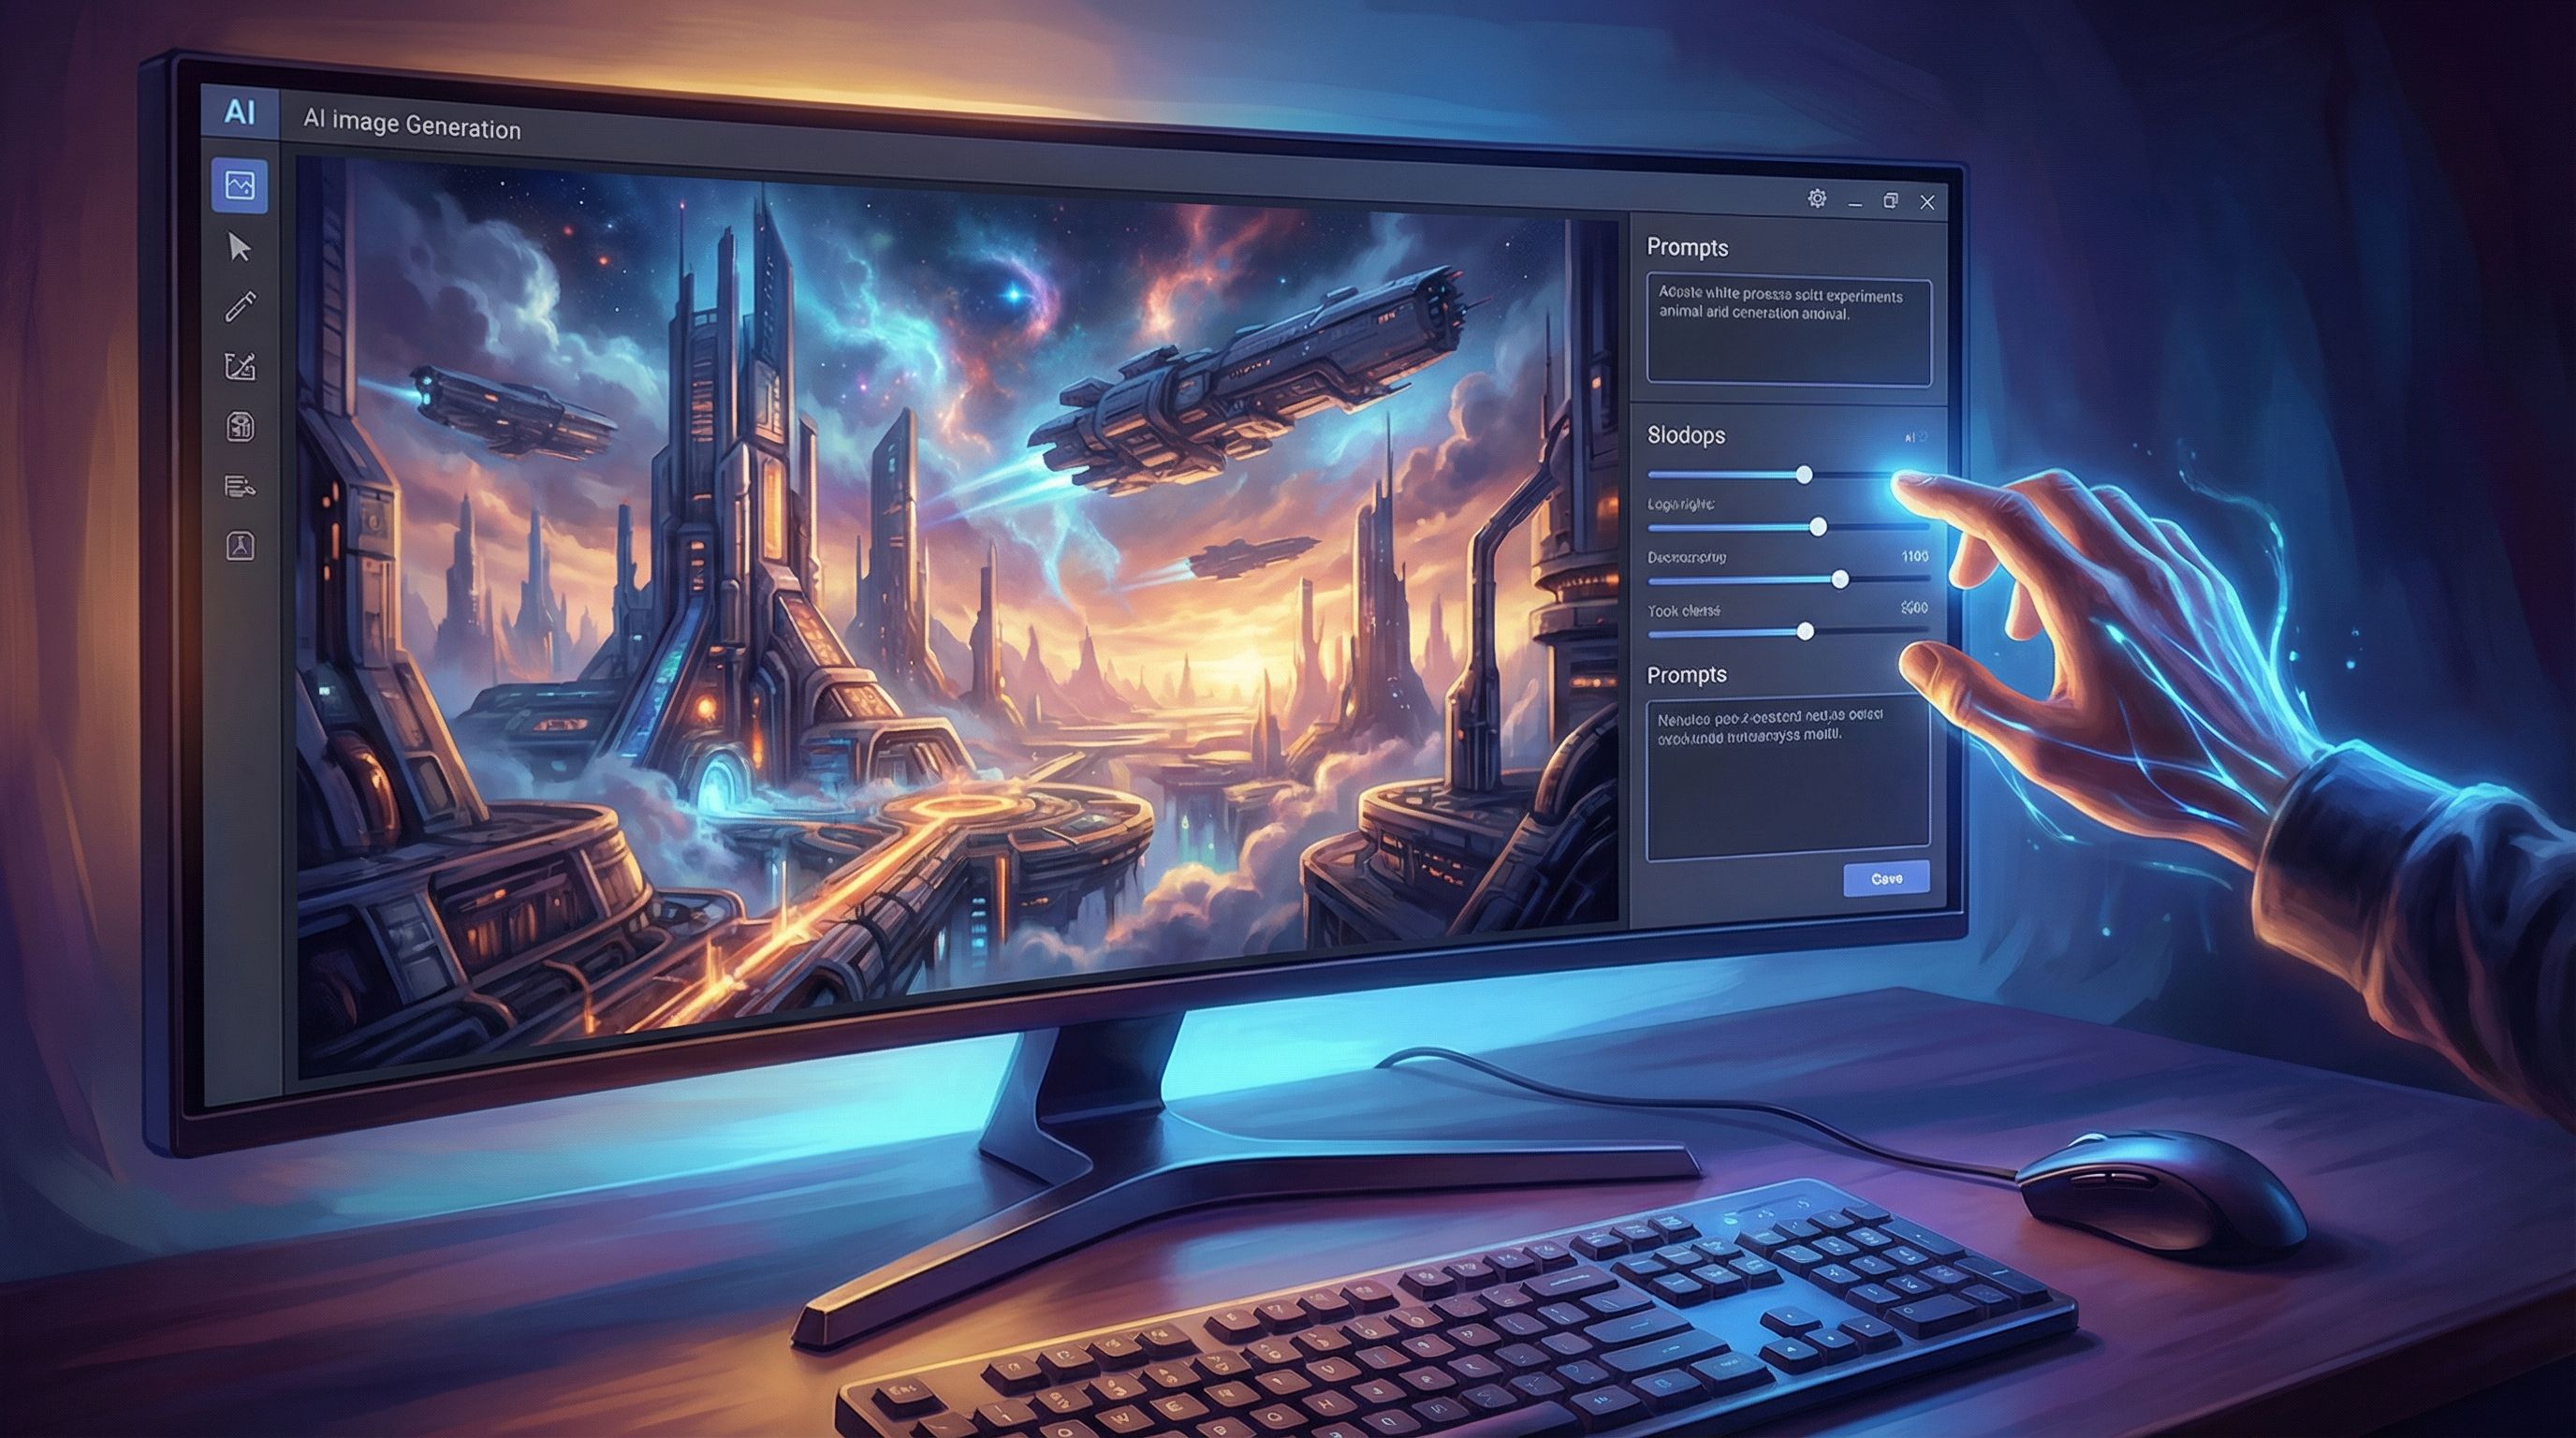
Step 4: Add AI Visuals and Light Polish (30 Minutes)
Now you’ll make the prototype feel alive—without falling into the rabbit hole of art direction.
Prioritize Only the Most Important Visuals
You do not need a unique image for every node in a first sprint. Focus on:
- The opening scene (sets tone and setting)
- The key decision node (high tension)
- The most dramatic consequence on each branch
That might be 3–5 images total.
Inside Questas:
- Use the built-in AI image generation for each priority node.
- Write prompts that include:
- Setting (e.g., “neon-lit checkpoint on a rainy night”)
- Character details (e.g., “nervous courier with a satchel”)
- Mood and camera angle (e.g., “cinematic close-up, shallow depth of field, tense atmosphere”).
- Keep style reasonably consistent (e.g., all semi-realistic, or all painterly).
You can refine visual continuity later using techniques from our post on style systems and ensembles, like AI Style Chains: Keeping Characters, Locations, and Props Consistent Across a Questas Series. For now, “coherent enough” is the goal.
Quick UX and Copy Polish
Before you move to playtesting, do a single pass for:
- Clarity: Are any choices ambiguous or misleading in a bad way?
- Pacing: Do any branches feel significantly longer or shorter than others?
- Friction: Are there dead-end feelings where a player has no meaningful choice for too long?
Don’t rewrite everything—just fix the sharp edges.
Step 5: Playtest and Capture Reactions (30 Minutes)
You now have a playable prototype. Time to see how it lands.
Run a Live, Over-the-Shoulder Test
If you can, grab a friend, colleague, or family member and:
- Share your Questas link.
- Ask them to share their screen or sit next to you.
- Tell them: “Think out loud as you play. Say what you expect to happen before you click.”
While they play, pay attention to:
- Where they hesitate before choosing
- Which choices they read out loud and react to
- Any moments of confusion (“Wait, who is this character again?”)
- Emotional spikes (laughter, frustration, surprise)
Ask Just a Few Focused Questions
After they finish a run (or two), ask:
- “Where did you feel the most tension or curiosity?”
- “Was there any choice that felt like a trick or didn’t matter?”
- “If I expanded this, what branch or moment would you want to see more of?”
Capture their answers in a simple doc or note.
Decide What “Success” Means for This Sprint
You’re not aiming for perfection; you’re looking for signal. For example:
- At least one moment where the player says “Oof, that’s a tough choice.”
- At least one branch where they say, “I want to replay and see what happens if I choose differently.”
- No major confusion about who they are or what they’re trying to do.
If you hit those, your one-evening sprint did its job.
What to Do With Your Prototype Tomorrow
Once you’ve slept on it, you can:
- Expand the strongest branch. Add another decision or two where testers wanted more.
- Refine visuals and continuity. Start building a more consistent visual language or character ensemble.
- Connect it to a larger series. If you’re building a world or brand story, this prototype can become Episode 0 of a bigger arc—see how we handle ongoing canon and player choices in From Static IP to Living Canon: Keeping Fan Theories and Player Choices in Sync Across a Questas Series.
- Use it as a pitch artifact. For teams, agencies, or educators, a tiny playable demo often explains your idea better than any deck.
Most importantly, you now have proof that you can ship interactive stories in small, repeatable bursts.
Common Pitfalls (and How This Sprint Avoids Them)
As you repeat this pattern, watch out for a few traps:
-
Over-branching too early
Adding four or five options per node sounds rich but quickly becomes unmanageable. The sprint’s 2–3 option limit keeps your graph sane. -
Writing lore instead of scenes
If you catch yourself worldbuilding for 45 minutes without creating a single playable node, pause and redirect. The sprint forces you into the editor by the end of the first hour. -
Letting AI overwrite your voice
AI is great for speed and variation, but your unique sensibility is the reason this story exists. Use AI to augment your wording, not to replace your perspective. -
Polishing visuals before structure
Gorgeous images won’t save a confusing or boring story. In this sprint, art comes after the branching spine and text are already working.
By sticking to the timebox and deliverables for each step, you sidestep these issues almost automatically.
Recap: Your One-Evening Story Sprint Checklist
When you’re done, you should have:
- [x] A one-paragraph brief describing the player, the key decision, and the tone
- [x] A small, readable node graph in Questas (6–10 nodes)
- [x] Written text for every scene and decision
- [x] 3–5 AI-generated images that sell the mood and setting
- [x] At least one live playtest with notes on reactions and next steps
If you can check all of those boxes, you’ve shipped a real, playable prototype—in one evening.
Ready to Run Your Own Story Sprint?
You don’t need a full studio, a giant lore bible, or weeks of open calendar space to start building interactive stories.
You need:
- A single evening
- A focused scenario
- A willingness to ship something imperfect
- A platform like Questas that lets you design branches, generate visuals, and share a playable link without touching code
Pick a night this week. Block off three hours. Open Questas. Then:
- Define your tiny, high-stakes slice.
- Sketch the branching spine.
- Draft scenes and choices.
- Add just enough visuals.
- Put it in front of one other human.
By the time you close your laptop, you won’t just think about making interactive adventures—you’ll have shipped one.
Adventure awaits. The first prototype is only an evening away.