AI Art Pitfalls and Fixes: Keeping Your Questas Visuals On-Model, On-Brand, and Not Weird

AI Art Pitfalls and Fixes: Keeping Your Questas Visuals On-Model, On-Brand, and Not Weird
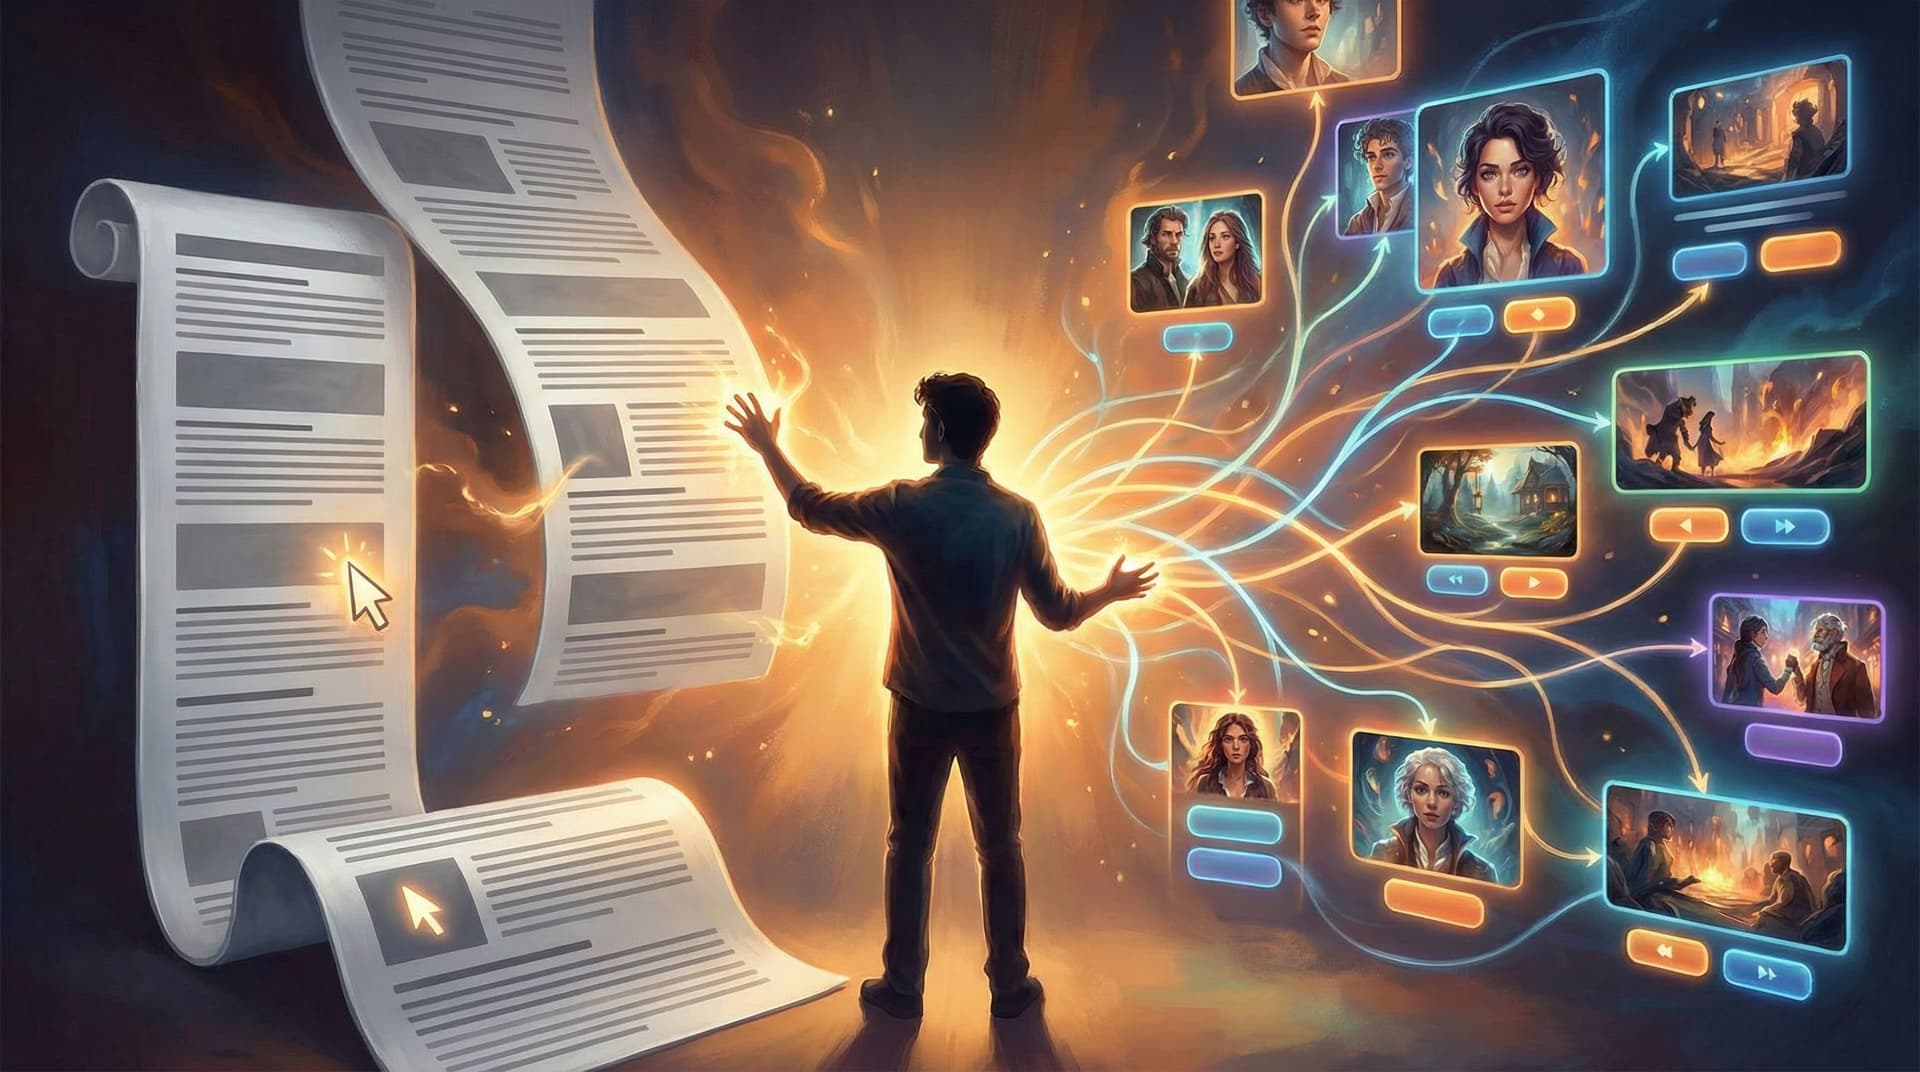
AI images can feel like magic—until your hero suddenly grows an extra hand, your brand colors vanish, or your “cozy starship kitchen” looks like five different spaces across five scenes.
When you’re building interactive stories in Questas, visuals aren’t decoration. They’re part of the gameplay: players read expressions, scan environments for clues, and form emotional bonds with characters based on how they look from scene to scene. If those visuals drift off-model or off-brand, the spell breaks.
This post is all about avoiding that drift: the common AI art pitfalls that make your Questas stories feel inconsistent or uncanny—and concrete ways to fix them.
Why Consistent AI Visuals Matter So Much in Questas
Whether you’re adapting a campaign, building a training scenario, or designing a micro-adventure, your visuals are doing three big jobs:
-
Character continuity
Players need to recognize your protagonist, mentor, rival, or mascot instantly, even when they change outfits or locations. If your detective suddenly has a different face shape or skin tone between scenes, it feels like a different person. -
World coherence
Your setting—dark academia campus, neon noir city, whimsical forest school—needs a recognizable visual language: color palette, lighting, level of detail, aspect ratio, and camera angles. If every branch looks like a different art director took over, the world stops feeling real. -
Brand alignment
For educators, studios, or organizations using Questas, visuals carry your brand: colors, logo usage, tone (playful vs serious), and representation choices. On-brand visuals build trust; off-brand ones feel like stock art glued onto your story.
If you want a deeper dive into defining that visual language, bookmark From Moodboard to Mission: Designing Visual Style Guides for Consistent Questas Adventures—it’s a perfect companion to this piece.
The Most Common AI Art Pitfalls (and Why They Happen)
Before we fix things, it helps to name them. Here are the issues Questas creators run into most often:
-
Off-model characters
Same character, different face/body/features every time. -
Uncanny or distorted anatomy
Extra fingers, impossible joints, melted objects, or “almost human but not quite” expressions. -
Inconsistent style
One scene looks like a painterly illustration, the next like a hyper-real 3D render. -
Background noise and clutter
AI invents distracting props, unreadable text on signs, or pseudo-logos that confuse the scene. -
Weird artifacts in motion (for video loops)
Flickering, morphing faces, or objects that jump around from frame to frame. -
Ethical or representational misfires
Stereotyped depictions, skewed body types, or culturally insensitive mashups.
Most of these come from the same root causes:
- Prompts that are too vague or change subtly from scene to scene.
- No clear visual style guide for the project.
- Relying on random generations instead of iterating from a stable base.
- Letting the AI “decide” representation instead of you making intentional choices.
The good news: all of this is fixable with a handful of workflows and habits.
Step 1: Lock in Your Visual North Star
Before you generate your tenth image, decide what “on-model, on-brand, not weird” actually means for this project.
Define a one-page style brief
You don’t need a 40-page brand bible. A single page that answers these questions will do:
-
What’s the core visual vibe?
Examples: “soft watercolor fantasy,” “gritty cyberpunk street photography,” “flat, colorful educational infographics.” -
What’s the color language?
- Primary colors (e.g., teal and coral)
- Neutrals (e.g., charcoal, warm beige)
- Accent colors (e.g., electric yellow for magical effects)
-
What’s the camera and framing style?
- Mostly medium shots of characters?
- Wide, cinematic vistas?
- First-person POV for key decisions?
-
What’s the level of realism?
- Stylized / cartoony
- Semi-realistic
- Photorealistic
-
Any hard no’s?
- No gore, no hyper-sexualized poses, no visible branded logos, etc.
If you haven’t built a style guide before, From Moodboard to Mission: Designing Visual Style Guides for Consistent Questas Adventures walks through this process in more depth.
Turn that brief into prompt building blocks
From your one-page brief, extract reusable phrases:
soft, painterly illustration, muted teal and coral palette, gentle rim lighting, 3/4 viewclean flat vector art, bold outlines, high contrast, educational, inclusive castcinematic ultra-wide shot, moody neon lighting, shallow depth of field
Save these as reusable prompt chunks in your notes or directly inside your Questas project so you can paste them into every generation.

Step 2: Make Your Characters “Cast Members,” Not Random Extras
AI is great at inventing faces. That’s the problem.
If you let it, it will happily give you a new version of your protagonist in every scene. Instead, treat your main characters like a cast you’re recasting again and again.
Create a character spec per major character
For each recurring character, write down:
-
Core description
Age range, body type, skin tone, hair texture and color, eye color, key clothing elements. -
Signature details
Scar, tattoo, jewelry, glasses, hairstyle, mobility aid, etc. -
Default emotional baseline
Calm, intense, playful, wary.
Example spec:
“Rin, 17-year-old nonbinary student, medium brown skin, round face, locs tied back with teal scarf, dark brown eyes, stocky build, always wearing a patched denim jacket with enamel pins, expression usually thoughtful or amused.”
Build a “master reference” image
- Use your character spec plus your style building blocks in a prompt.
- Generate several options; pick the most on-model image.
- Treat this as the canonical reference for that character.
From here on, when you prompt for Rin, you:
- Reuse the same description text almost verbatim.
- Add context for pose and emotion:
Rin, [full character description], leaning over a cluttered workbench, excited, mid-laugh, same visual style as reference
If your tools support it, you can:
- Use image-based prompting or reference images to anchor the face.
- Use seeds or style presets to keep outputs closer together.
For a deeper dive into designing casts that actually play well in interactive stories, check out From Prompt to Playable: Designing Your First AI-Generated Character Cast in Questas.
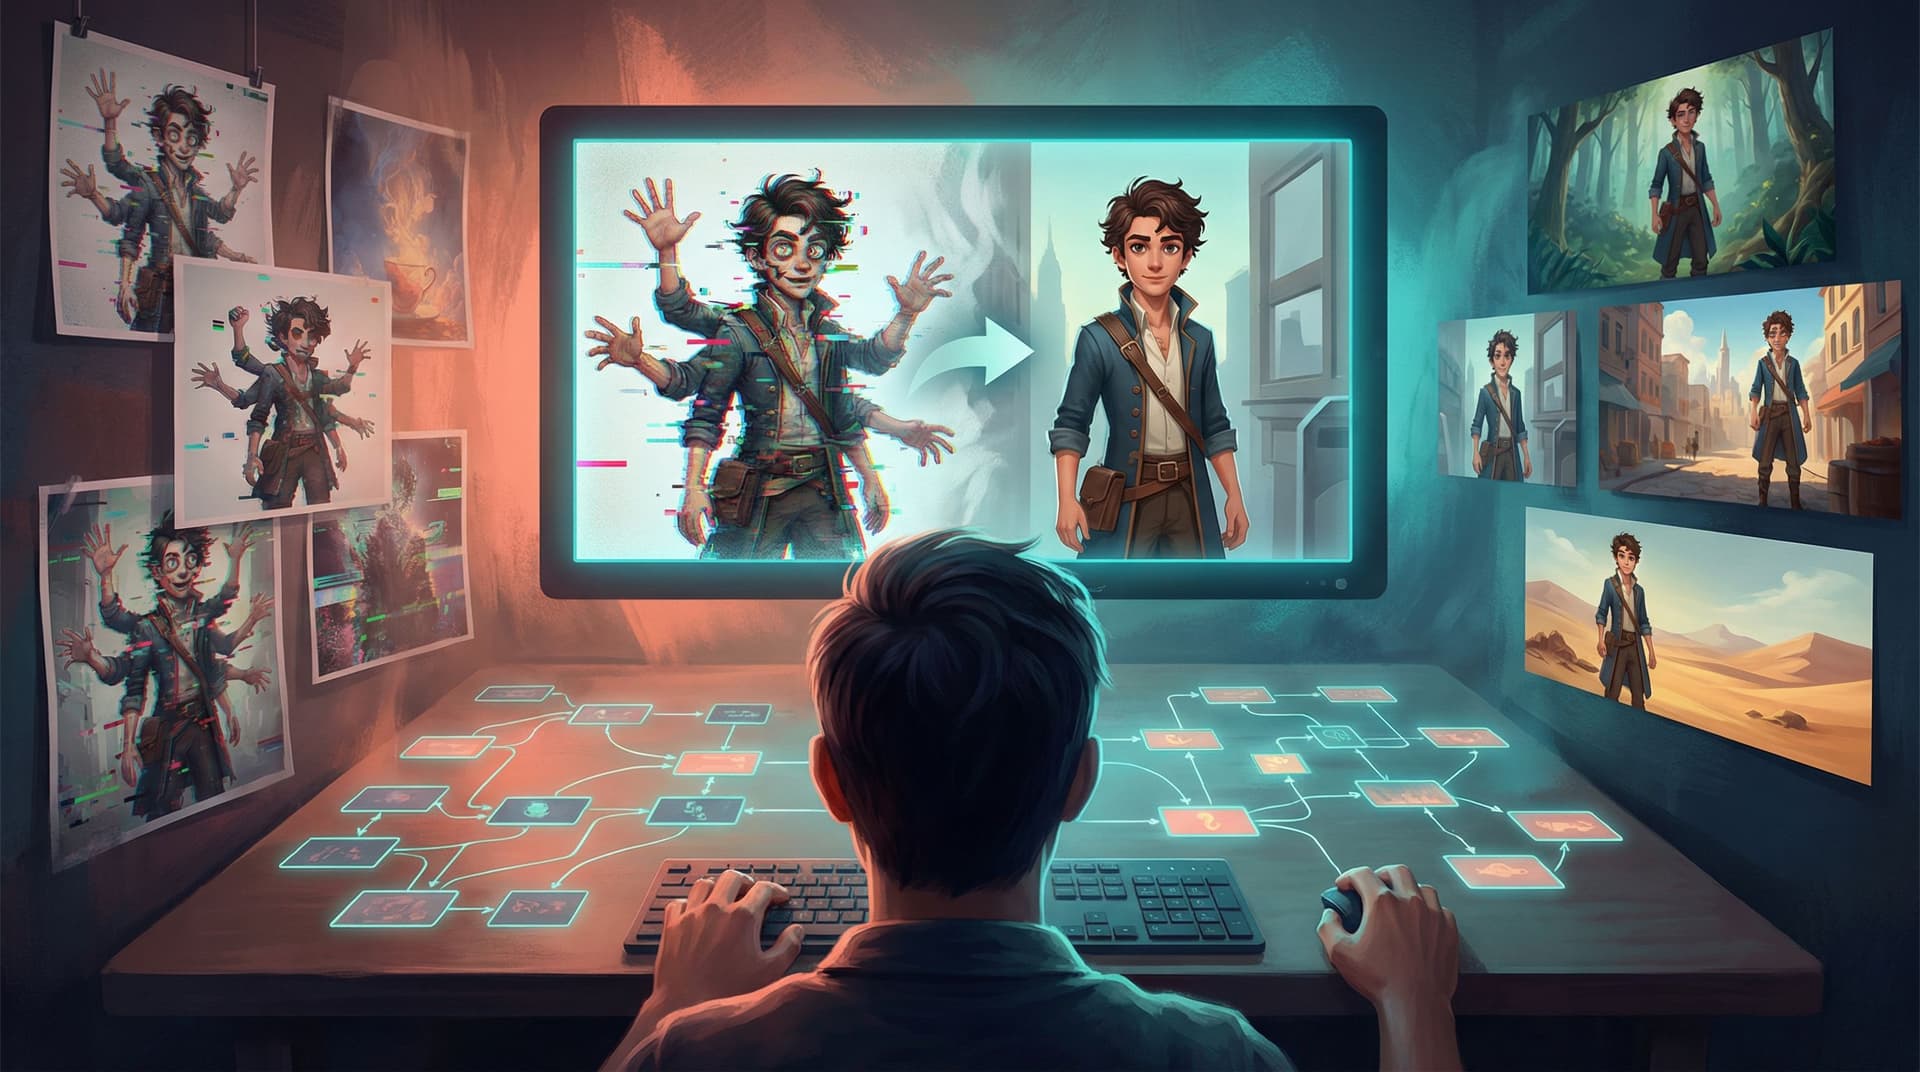
Fixing off-model issues quickly
When a new image is “almost right” but off in one or two ways:
- Regenerate with constraints:
Addconsistent with previous images of Rin, same face, same hairstyle, same jacketto the prompt. - Nudge, don’t rewrite:
Keep 80–90% of the prompt identical; only tweak pose, expression, or scene. - Use crops and framing:
If background chaos is throwing off the model, generate a closer crop or specifysimple background.
Step 3: Tame Anatomy and Uncanny Weirdness
Hands with too many fingers and faces that melt at the edges are a classic AI tell. They’re distracting, and in story scenes they can undercut key emotional beats.
Prompt for clarity and simplicity
-
Be explicit about limbs and hands:
hands clearly visible, natural pose, correct anatomy
no extra fingers, no distorted limbs -
Limit complexity in one frame:
Instead of “five characters all holding different props and interacting,” try:
two characters in foreground, others suggested in soft focus background -
Use neutral or stable poses for crucial scenes:
For important dialogue beats, aim forstanding or sitting, relaxed, natural posturerather than acrobatics.
Use composition to hide risk zones
You don’t have to show everything.
- Crop at mid-torso or shoulders for emotionally intense dialogue.
- Use over-the-shoulder shots where only one character’s hands are visible.
- Frame objects of interest instead of full bodies when anatomy is less important.
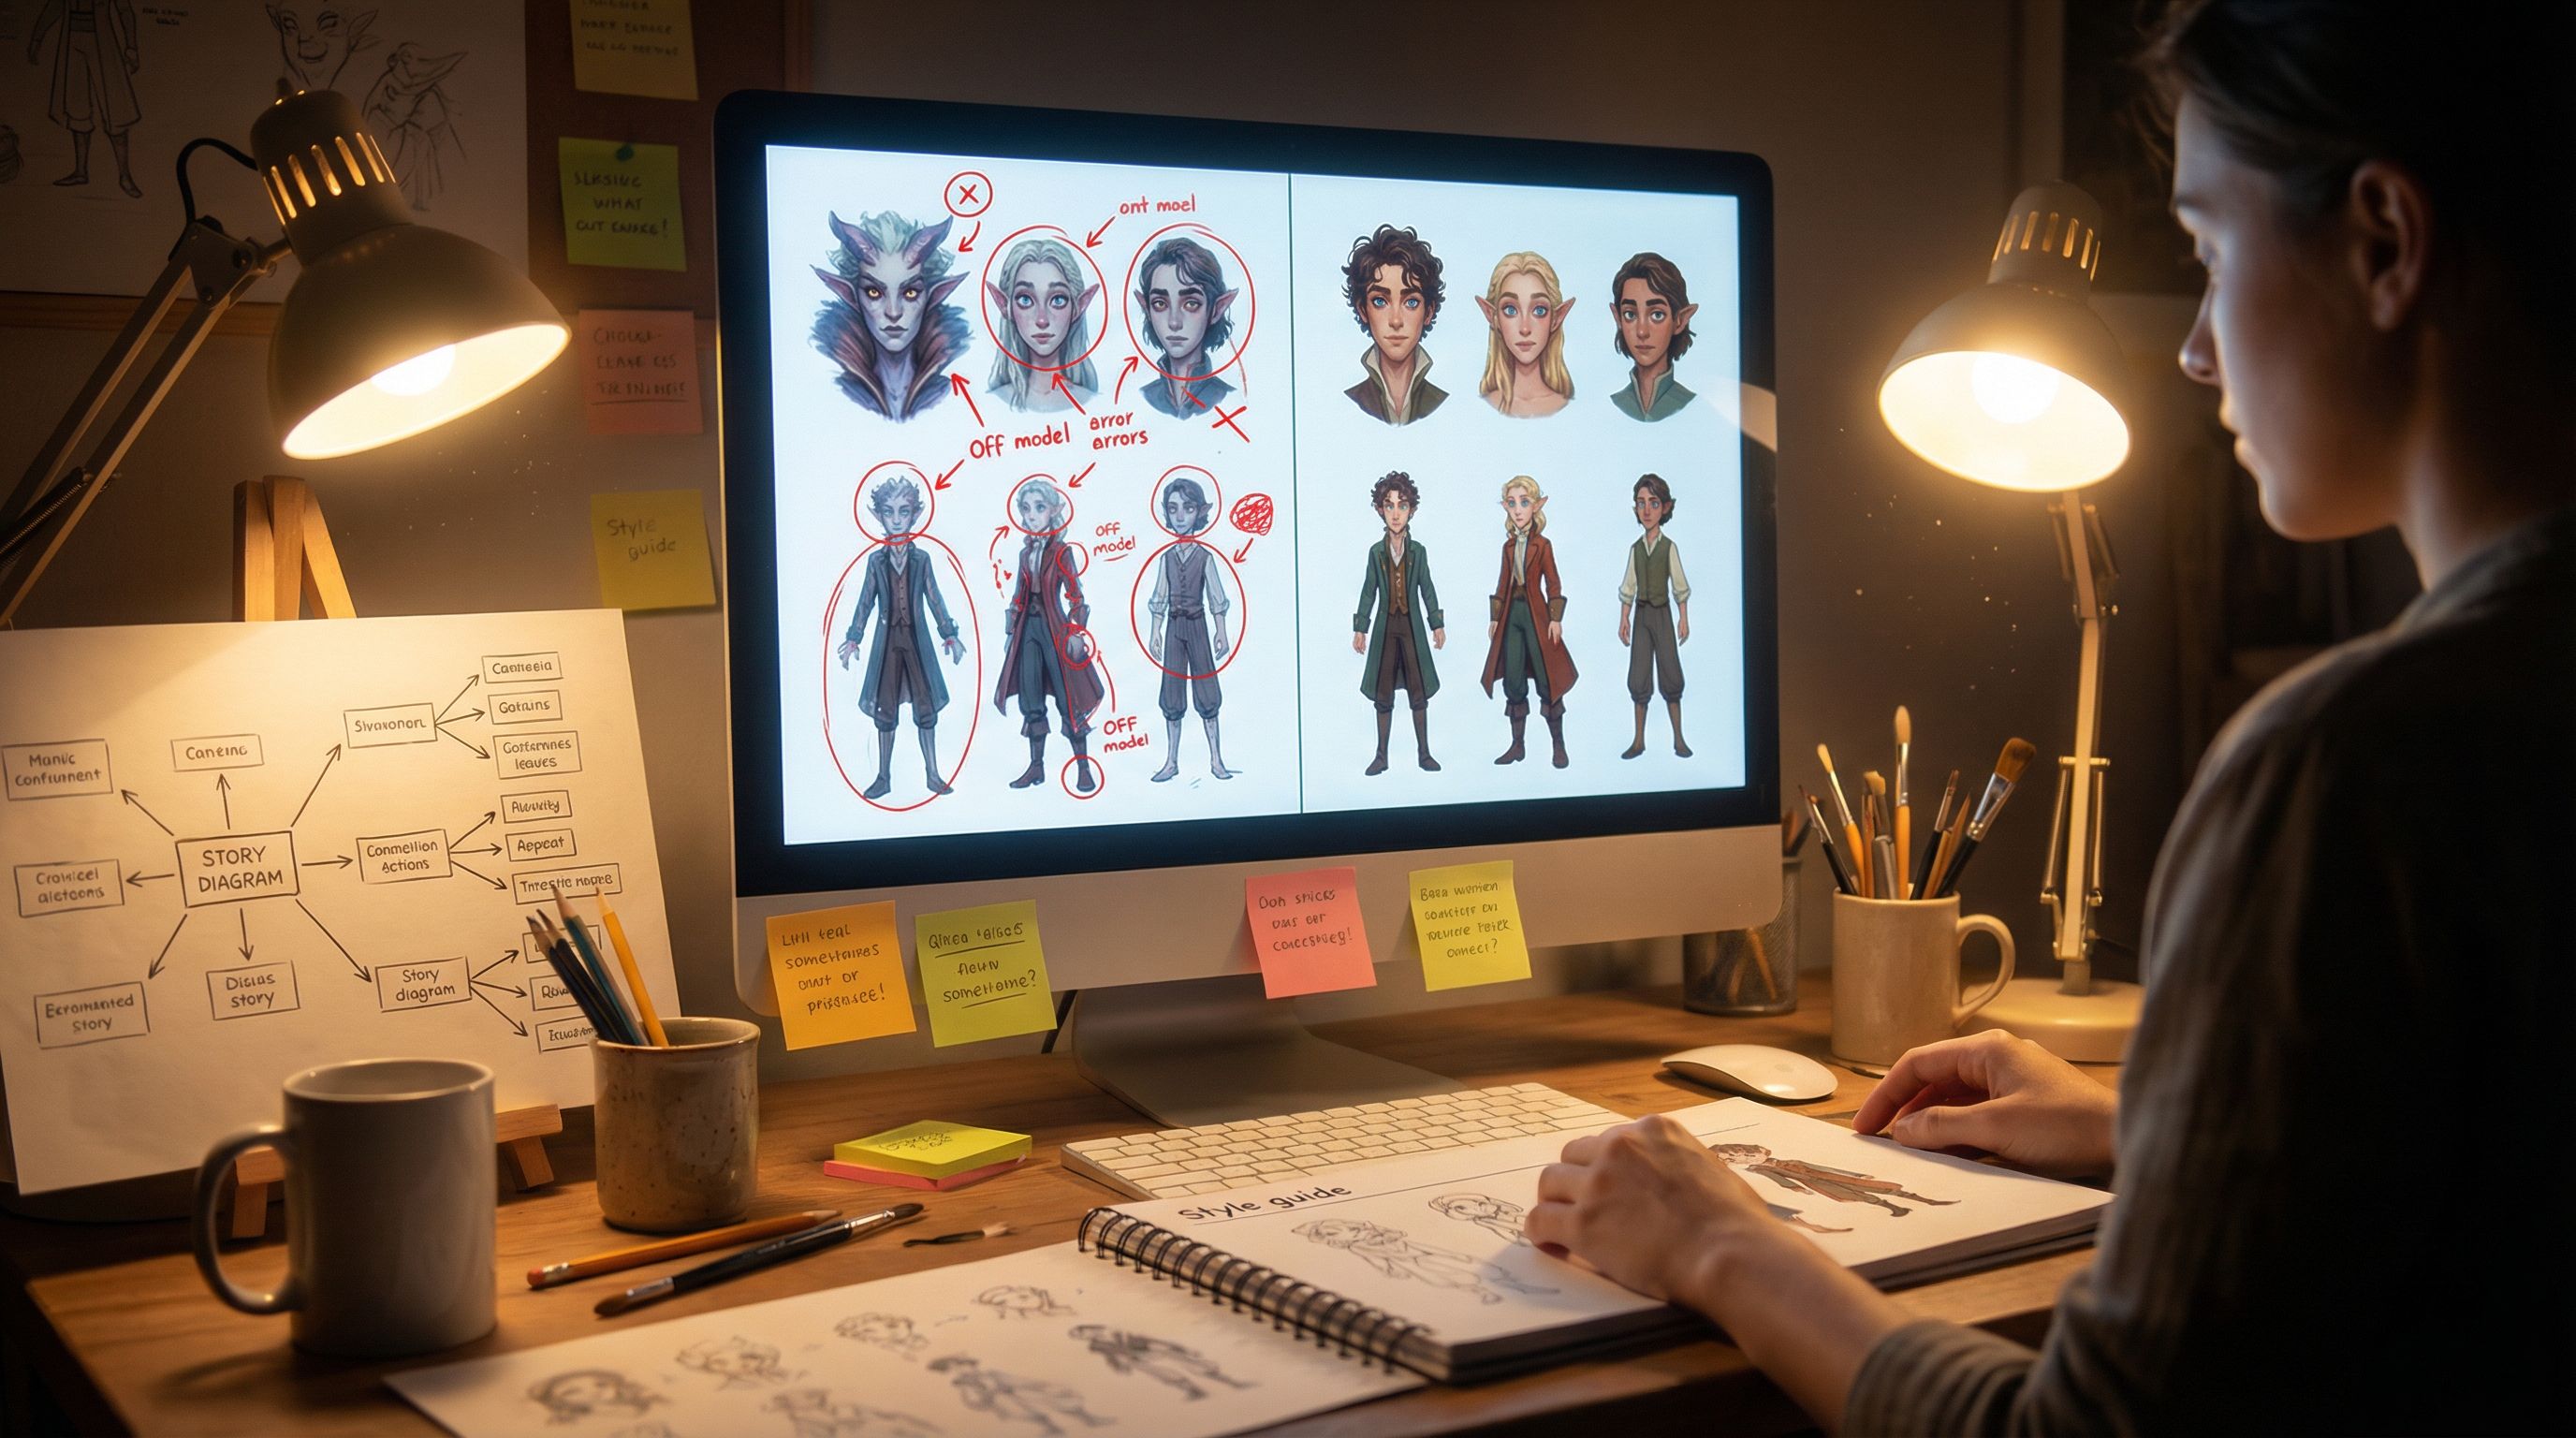
Build a quick QA checklist
Before you lock an image into your Questas scene, ask:
- Do all visible hands have a believable number of fingers and joints?
- Do faces look consistent and non-melted at the edges?
- Any random extra limbs, shadows, or ghostly duplicates?
- Any unreadable or nonsense text that might confuse players?
If something feels “off” but you can’t name it, get a second pair of eyes or run a small playtest. (The post Playtesting Your Questas Like a Game Designer: Scripts, Checklists, and What to Watch For has great tips for what to look for when images and story meet.)
Step 4: Keep Style and Brand Locked Across Branches
Branching narratives are where inconsistency loves to hide. One path gets newer images, another keeps older ones, and suddenly half your story looks like a different project.
Standardize technical settings
Where your tools allow it, keep these consistent:
-
Aspect ratio:
Decide on 16:9, 4:3, square, or vertical and stick to it. This keeps your Questas layout clean. -
Resolution:
Enough detail to look crisp on common devices, but not so huge that loading slows down. -
Style preset or model choice:
Don’t bounce between multiple wildly different models unless you have a diegetic reason (e.g., dream sequences).
Use “anchor scenes” as calibration
Pick 3–5 key scenes that define your project’s look:
- Opening scene
- First big choice
- Midpoint twist
- Climactic confrontation
- One quiet, reflective moment
When you generate new images for side branches or added scenes:
- Compare them directly to these anchors.
- Ask: If I shuffled these into a deck, would they clearly belong to the same story?
- If not, adjust prompts or regenerate until they do.
Don’t forget your brand layer
If you’re building Questas stories for a team, client, or institution:
-
Use brand colors intentionally:
- Environment lighting that leans toward your brand palette.
- Props or UI elements in-brand colors (e.g., a teal datapad, coral signage).
-
Align tone with your brand voice:
- A playful brand? Favor brighter lighting, softer shapes, and friendlier expressions.
- Serious training scenarios? More grounded realism, neutral palettes, and clear, readable compositions.
-
Be consistent about logo usage:
- Usually better to avoid real-world logos and rely on abstract shapes, especially for public-facing work.
For creators working on campaigns, client prototypes, or training content, No-Code, Pro-Grade: Turning Client Briefs into Interactive Questas Prototypes in a Single Afternoon has practical advice on translating brand guidelines into visual prompts.
Step 5: Make Ethical, Intentional Choices About Representation
“Not weird” isn’t just about anatomy. It’s also about how your images portray people, cultures, and power.
AI models are trained on large datasets that can bake in bias. Left unchecked, that can show up as:
- Over-representation of certain body types, skin tones, or genders in heroic roles.
- Stereotypical clothing or props when you reference specific cultures.
- Sexualized or violent imagery when you didn’t ask for it.
Set representation goals up front
Before generating:
- Decide your cast diversity (race, gender, age, body types, disabilities).
- Decide how different roles (leaders, villains, mentors, learners) are distributed.
Then, encode that in your prompts, instead of leaving it to chance.
Watch for subtle bias and course-correct
As you generate images, periodically review:
- Are certain identities only appearing as background extras?
- Are villains always coded in specific, stereotypical ways?
- Are body types varied, or defaulting to one ideal?
If you spot patterns you don’t like, adjust prompts and regenerate.
For a deeper framework on this, see Ethical AI Worldbuilding: Guidelines for Responsible Imagery, Representation, and Choices in Questas.
Step 6: Build a Reusable Visual Workflow for Questas Projects
The creators who get the most mileage out of AI visuals treat them like a pipeline, not one-off magic tricks.
Here’s a simple workflow you can adapt:
-
Draft your story structure first
Sketch your main branches and key beats in Questas or on paper. (If structure is a pain point, Branching Without Chaos: Simple Story Mapping Techniques for Complex Questas Narratives can help.) -
Create your visual guide pack
- One-page style brief
- Character specs + reference images
- A handful of environment reference images for main locations
-
Generate images in batches by category
- Session 1: protagonist in multiple poses and emotions.
- Session 2: key locations in different moods (day/night, calm/chaotic).
- Session 3: secondary characters and props.
-
Curate ruthlessly
Don’t use everything you generate. Pick the most on-model, on-brand images and archive the rest. -
Wire images into scenes and playtest
- Drop images into your Questas nodes.
- Run through each major path as if you’re a player.
- Note any jarring visual jumps or off-model moments.
-
Iterate where it actually matters
Focus your revision time on:- Opening scenes (first impressions).
- Big choices and reveals.
- Endings.
If you’re planning to ship stories regularly, Building Your Questas Pipeline: A Workflow for Drafting, Testing, and Publishing Interactive Stories at Scale goes deeper on turning this into a repeatable system.
Step 7: When to Use Video, and How to Keep It Non-Weird
AI-generated micro-video is powerful—but it can amplify weirdness if you’re not careful.
Use short loops in Questas when:
- You want to signal a big moment (portal opening, ship taking off, spell activating).
- You’re emphasizing environmental mood (rain on windows, neon sign flicker, campfire embers).
To keep loops clean:
- Favor environmental or abstract motion over close-up faces.
- Keep loops 2–6 seconds; longer clips invite more artifacts.
- Avoid complex overlapping motion (e.g., crowds plus camera pan plus animated UI).
For more ways to use video and sound without overwhelming your story, see Beyond Text and Images: Using Ambient Audio and Micro-Video to Deepen Immersion in Questas.
Quick Reference: Pitfalls and Fixes
Off-model characters
- Fix: Character specs + reference images, near-identical prompts, image-based prompting.
Uncanny anatomy
- Fix: Simpler poses, explicit anatomy constraints, strategic cropping, QA checklist.
Inconsistent style
- Fix: One-page style brief, reusable prompt blocks, anchor scenes, consistent aspect ratio and model.
Brand drift
- Fix: Encode brand colors and tone in prompts, avoid real-world logos, compare new images to brand examples.
Biased or harmful representation
- Fix: Intentional cast planning, explicit representation prompts, periodic bias audits, regenerate when needed.
Messy, artifact-heavy video
- Fix: Short loops, environment-focused motion, limited complexity.
Wrapping Up: Let the Story Be Weird, Not the Visuals
Surprise, wonder, and strangeness belong in your story choices—not in accidental extra fingers or off-brand art.
By:
- Defining a clear visual north star,
- Treating characters like a consistent cast,
- Building a simple QA habit, and
- Making intentional, ethical choices about representation,
you can turn AI visuals from a source of anxiety into one of your biggest strengths in Questas.
The result? Players who stay immersed, trust your world, and want to explore every branch you’ve built.
Your Next Move
If you’re ready to put this into practice:
- Open a new or existing project in Questas.
- Draft a one-page visual brief and one character spec.
- Generate a small batch of test images for 2–3 key scenes using the techniques above.
- Drop them into your story and run through one full path as a player.
You don’t have to fix every visual at once. Start with a single character or scene, get it feeling on-model and on-brand, and expand from there.
Adventure awaits—this time with visuals that fully live up to the story you’re telling.